|
Apex
Webmail Setup
Please
follow the following instructions to set up your Apex
Webmail account for the first time.
 Click
here for a printer-friendly version of these instructions. Click
here for a printer-friendly version of these instructions.
1.
Log in to your account from the login screen.
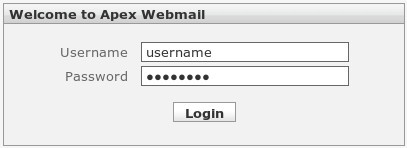
Please
note: all usernames and passwords are case sensitive.
2.
Once you are logged in, click on Settings near the upper
right corner of the screen.

3.
Next click on the "Identities" tab.

4.
On the left side pane, click on your email address if
it appears in the list. If the list is empty, click
on the Plus Sign button in the lower left corner and
a new entry will appear. Enter in your Full Name, and
Email address in the fields just to the right. You do
not need to specify a Reply To address (this is only
used if you want people to reply to a different email
address other than the one specified above). Note:
the "Email:" field must be correct in order
for you to send out email with your account.
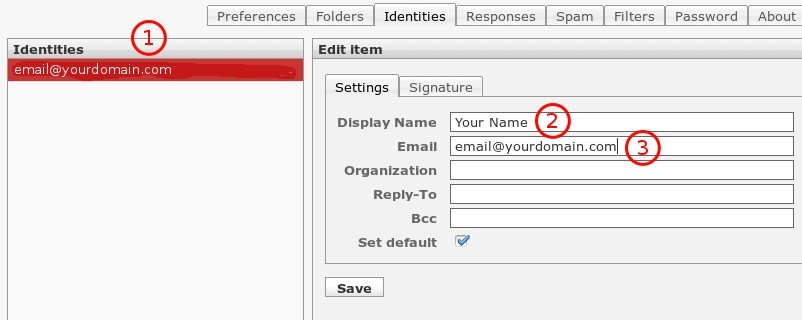
5.
When you have finished, click on "Save" to
save your information.
6.
Steps are complete! You can now click on the "Mail"
button in the upper right corner of the screen to start
using your email account.
Click
here for a printer-friendly version of these instructions.
|